Best Travel Card for Japan 2026: Suica, ATMs & No-Fee Banking

Japan is one of those places where getting your money situation wrong can genuinely ruin your trip. Despite its reputation as a tech powerhouse, cash is still king in a surprising number of situations — from tiny ramen shops in Golden Gai to rural onsen towns. But things are shifting fast, and card acceptance has improved massively since my first trip back in 2019.

I’ve now spent a combined four months in Japan across multiple visits, and I’ve tested pretty much every card and banking option available to Australian travellers. This guide covers exactly what I carry, what I recommend, and how to avoid getting stung by fees.

¥150-180
AUD to JPY rate range (per $1)
70%+
Places now accepting card
3-5%
Fees you’ll pay with wrong card
2 cards
Minimum you should carry

The Winner: Wise is My Top Pick for Japan

I’ll cut straight to it. After testing multiple options across my Japan trips, Wise is the card I recommend for Japan in 2026. It consistently gives the best exchange rate (the real mid-market rate), charges the lowest conversion fees (typically 0.4-0.6% for AUD to JPY), and works reliably at Japanese ATMs and card terminals.

But — and this is important — you shouldn’t rely on a single card in Japan. I always carry at least two options, plus enough cash for a couple of days. Japan has improved dramatically with card acceptance, but you’ll still hit situations where it’s cash only. More on that below.

My Japan Wallet Setup: Wise as my primary card, Up Bank as backup, a Suica card on my phone for transit, and ¥20,000-30,000 in cash at all times. This combo has never let me down.

Cash vs Card in Japan: The 2026 Reality

There’s a lot of outdated advice floating around that says Japan is cash-only. That was largely true five or six years ago, but the situation has changed significantly — partly driven by the government’s push for cashless payments and partly by the tourism boom since borders reopened.

Where Cards Are Now Widely Accepted

  • Convenience stores — 7-Eleven, Lawson, FamilyMart all take Visa/Mastercard and contactless
  • Chain restaurants — Yoshinoya, Matsuya, Sukiya, most chain izakayas
  • Department stores and shopping malls — basically everywhere
  • Hotels and hostels — nearly all accept card now
  • Train stations — ticket machines and Suica top-ups
  • Major tourist attractions — temples, museums, theme parks
  • Taxis — most in cities accept card, though some rural ones don’t

Where You’ll Still Need Cash

  • Small independent ramen shops — especially the ticket machine ones (some now accept IC cards, but many are still coin-operated)
  • Street food stalls — Dotonbori, Tsukiji outer market, festival stalls
  • Some shrines and temples — for entry fees, omamori (charms), goshuin stamps
  • Rural areas — smaller towns, countryside ryokans, local buses
  • Some izakayas — particularly the tiny ones under train tracks in places like Yurakucho
  • Coin lockers — some accept IC cards, but many older ones are coin-only
  • Vending machines — most now take IC cards, but some older ones are cash-only

My rough estimate for 2026: about 70-75% of transactions can be done by card in major cities like Tokyo, Osaka, and Kyoto. Drop that to maybe 40-50% once you’re in smaller cities and rural areas. So yes, you need a good card setup — but you also absolutely need cash.

I once spent an entire afternoon in Takayama with ¥200 in my pocket because I’d assumed I could use my card everywhere. Ended up walking past incredible street food stalls selling mitarashi dango and Hida beef skewers, unable to buy anything. Lesson well and truly learned — I now always withdraw cash before heading to smaller towns.

Best Travel Cards for Japan: Full Comparison

I’ve compared the main options available to Australian travellers (and most of these work for other nationalities too). Here’s how they stack up for Japan specifically.

FeatureWiseUp BankYouTripRevolutBig 4 Bank (e.g. CBA)
Card Fee$7 AUD one-offFreeFreeFree (Standard)Free (with account)
Exchange RateMid-market rateMastercard rateMid-market rateMid-market (weekdays)Their own rate (poor)
Conversion Fee0.4-0.6%0% (no markup)0%0% (up to limit)2-3%
ATM Withdrawal Fee1x free/month, then ~$1.50Free (unlimited)Free (up to limit)1x free/month (Standard)$5+ per withdrawal
Japanese ATM CompatibilityExcellentGoodGoodGoodGood
Contactless in JapanYes (Visa)Yes (Mastercard)Yes (Mastercard)Yes (Visa)Yes
Hold JPY in AppYes — convert in advanceNoYesYesNo
Multi-Currency50+ currenciesNoYes (multiple)Yes (30+)No
Best ForPrimary card — best overallATM withdrawals & backupStrong alternativeEurope-focused travellersAvoid if possible
A note on exchange rates: The AUD to JPY rate has been sitting around ¥95-100 per dollar in early 2026. Wise gives you the actual mid-market rate with a small transparent fee. Your big four bank will typically give you a rate 2-3% worse — on a ¥500,000 trip spend, that’s $100-150 AUD you’re throwing away.

Wise: Best Overall Travel Card for Japan

Wise (formerly TransferWise) is the card I’ve used as my primary spending card in Japan on my last three trips, and it’s consistently been the best option. Here’s why it works so well specifically for Japan.

Why Wise Works So Well in Japan

Pre-convert to JPY: This is the big one. With Wise, you can convert your AUD to JPY inside the app whenever the rate looks good — even weeks before your trip. This means you lock in a rate you’re happy with and avoid any surprises. I converted a chunk of AUD to JPY when the rate hit ¥100 per dollar, which saved me a decent amount compared to what the rate was when I actually arrived.

Transparent fees: The conversion fee for AUD to JPY is typically around 0.4-0.6%. That’s it. No hidden markups, no weekend surcharges (looking at you, Revolut). The app shows you exactly what you’ll pay before you confirm.

ATM withdrawals: You get one free ATM withdrawal per month (up to $350 AUD equivalent), then it’s about $1.50 per withdrawal after that. The card works reliably at 7-Eleven ATMs and Japan Post ATMs — the two most common options for international cards.

Card acceptance: The Wise card is a Visa debit, and Visa is widely accepted across Japan. Contactless (tap) works at most terminals that accept it, which saves time.

Wise Downsides for Japan

  • The one free ATM withdrawal per month is limiting if you need cash frequently — this is where having Up Bank as a backup helps
  • The physical card costs $7 AUD (a one-time fee, and honestly worth it)
  • Some very old Japanese card terminals might not recognise it — rare, but it’s happened to me once at a small ryokan in Hakone
Pro tip: Always select “Pay in JPY” if a terminal asks you to choose between JPY and AUD. Choosing AUD triggers Dynamic Currency Conversion (DCC), which uses the retailer’s terrible exchange rate instead of Wise’s. This applies to every card, not just Wise.

Up Bank: Best Australian Backup Card

If you’re Australian, Up Bank is the best backup card to pair with Wise. I’ve been using Up for years now, and it’s genuinely one of the best Australian bank accounts for travel.

Why Up Bank is Great for Japan

No international ATM fees: Up doesn’t charge you anything to withdraw cash overseas. Zero. This is massive in Japan where you’ll need cash regularly. While Wise limits you to one free withdrawal per month, Up gives you unlimited free ATM withdrawals.

No foreign transaction fees: Up uses the Mastercard exchange rate with zero markup. The Mastercard rate is very close to the mid-market rate — usually within 0.1-0.2%. For everyday spending, the difference between Up and Wise is genuinely negligible.

It’s a real Australian bank account: This means you can receive your salary, set up direct debits, and manage your money from one place. Wise is technically a financial services company, not a bank — so having Up as your actual bank account makes sense.

Up Bank Downsides for Japan

  • You can’t hold JPY — every transaction converts from AUD at the time of purchase
  • Mastercard acceptance is slightly less common than Visa in Japan (though the gap is narrowing)
  • Only available to Australian residents
  • The app can occasionally be slow to update transactions when you’re overseas

My strategy: I use Wise as my primary card for purchases (especially since I pre-convert to JPY), and Up Bank for ATM withdrawals. This way I get the best of both worlds — Wise’s locked-in rate for spending and Up’s unlimited free ATM access for cash.

YouTrip: A Strong Alternative

YouTrip is another solid option that’s worth considering, especially if you want a multi-currency card with zero conversion fees. It’s available in Australia and uses the Mastercard wholesale exchange rate with no markup at all on currency conversion.

YouTrip Pros

  • 0% conversion fee — genuinely zero
  • Supports 150+ currencies including JPY
  • You can hold and convert JPY in the app (similar to Wise)
  • Free ATM withdrawals up to a monthly limit
  • No card issuance fee

YouTrip Cons

  • Newer to the Australian market, so less established than Wise
  • Mastercard rather than Visa (minor issue in Japan)
  • Lower ATM withdrawal limits compared to Wise and Up
  • Can’t receive salary or use as a primary bank account

If you already have YouTrip, it’s absolutely fine to use in Japan. But if you’re setting up from scratch, I’d still go with Wise + Up as your primary combo — they’re more established, more widely tested, and the combined features cover everything you need.

Suica & IC Cards: Essential for Getting Around

Okay, so Suica isn’t technically a “travel card” in the banking sense, but it’s absolutely essential for Japan and it ties directly into how you spend money there. If you’ve been to London and used an Oyster card, or Sydney and used an Opal card, same concept.

What is Suica?

Suica is a rechargeable IC (integrated circuit) card used for public transport and small purchases across Japan. It was originally a JR East product for the Tokyo area, but IC cards are now interoperable nationwide — so a Suica works in Osaka, Kyoto, Fukuoka, Sapporo, and basically everywhere with IC card readers.

Other IC cards include PASMO, ICOCA, and Kitaca. They all work the same way and are interchangeable, so don’t stress about which one you get.

How to Get Suica in 2026

iPhone users: You can set up a Suica directly in your Apple Wallet. This is by far the easiest option. Open the Wallet app, tap the + button, select “Transit Card”, choose Suica, and load money onto it. You can top up using your Wise or Up card. No physical card needed.

Android users: Google Wallet now supports Suica in Japan. The setup process is similar — add a transit card through Google Wallet. However, compatibility can vary by device, so check before you travel.

Physical cards: Physical Suica cards have been harder to get since the chip shortage. As of 2026, you can sometimes find them at major JR stations, but availability fluctuates. The Welcome Suica (tourist version) is available at Narita and Haneda airports and some major stations — it’s valid for 28 days and doesn’t require a ¥500 deposit.

What You Can Pay for with Suica

  • All trains, metros, and most buses across Japan
  • Convenience stores (7-Eleven, Lawson, FamilyMart)
  • Vending machines
  • Coin lockers at stations
  • Some restaurants and shops (look for the IC card symbol)
  • Taxi payments in many cities

I use my phone-based Suica for probably 40-50% of my daily spending in Japan. Tapping your phone at a konbini is faster than pulling out a card, and it works on every train and bus. Load it up with ¥5,000-10,000 at a time from your Wise card and you’re sorted.

Important: Suica has a maximum balance of ¥20,000 (roughly $200 AUD). You can’t use it for larger purchases. And if you’re buying a Japan Rail Pass or shinkansen tickets, those are separate — Suica is for everyday transit and small purchases.

ATMs in Japan: Where to Find Them & What to Expect

Japan has plenty of ATMs, but not all of them accept international cards. Here’s what actually works.

Best ATMs for International Cards
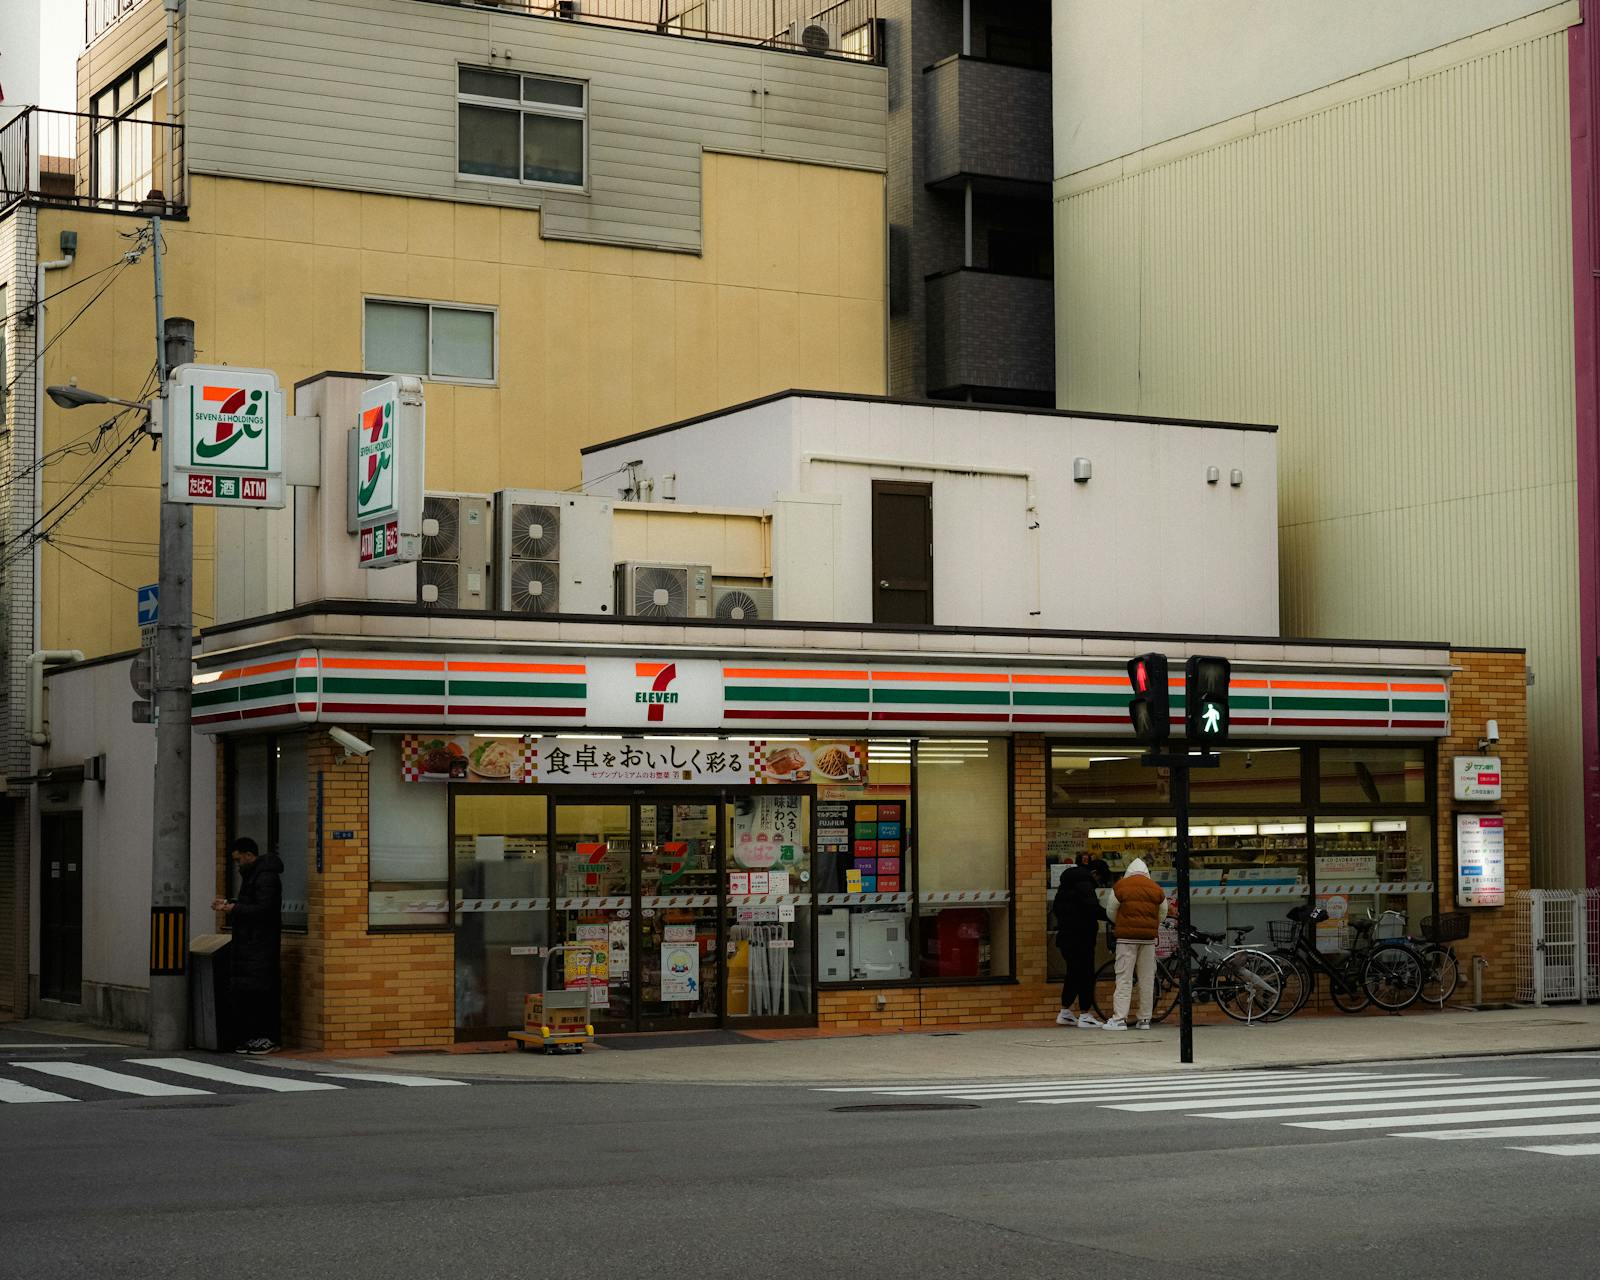
7-Eleven ATMs (Seven Bank): These are your best friend in Japan. They accept Visa, Mastercard, Maestro, Cirrus, and pretty much every international card. They’re available 24/7 in most locations, have English language options, and they’re everywhere — Japan has over 21,000 7-Eleven stores. I’d estimate 90% of my ATM withdrawals in Japan have been at 7-Eleven.

Japan Post ATMs (Yucho Bank): Found in post offices across the country, these also reliably accept international cards. Particularly useful in rural areas where 7-Elevens might be less common. Note that post office hours vary — some close at 5pm, though standalone ATMs may have extended hours.

Lawson ATMs: Lawson convenience stores have been rolling out international-card-compatible ATMs. Not as universally reliable as 7-Eleven, but improving.

AEON ATMs: Found in AEON shopping malls. Good option if you’re near one.

ATMs to Avoid

Most Japanese bank ATMs (Mizuho, MUFG, SMBC) do not accept international cards, or if they do, they charge hefty fees. Stick with 7-Eleven and Japan Post.

ATM Tips for Japan

  • Withdraw larger amounts less frequently — take out ¥30,000-50,000 at a time rather than ¥5,000 multiple times. This minimises any per-transaction fees.
  • Always decline the ATM’s conversion offer — if the ATM asks to convert to AUD, say no. Choose JPY. This avoids DCC and its terrible rates.
  • 7-Eleven ATMs have a per-transaction limit — usually ¥100,000 per withdrawal, which is more than enough.
  • Some ATMs charge their own fee — Seven Bank ATMs charge a small fee (around ¥110) for international withdrawals. This is separate from whatever your bank charges. With Up Bank, your bank fee is zero, so you only pay the ATM operator fee.
  • Notify your bank — both Wise and Up let you manage this in the app. Make sure Japan is enabled for your card before you arrive.

On my first trip to Japan, I tried to use a Mizuho ATM near Shinjuku station and the card was rejected three times. I panicked thinking my card was blocked. Walked 200 metres to a 7-Eleven and it worked instantly. Save yourself the stress — just head straight to a 7-Eleven.

Money Tips I Learned the Hard Way

1. Carry a Coin Purse

Japan uses ¥1, ¥5, ¥10, ¥50, ¥100, and ¥500 coins. The ¥500 coin is worth about $5 AUD, which is significant. You’ll accumulate coins fast, especially at vending machines and ramen ticket machines. A small coin purse or zip pocket saves you from jingling around like a walking piggy bank.

2. Budget Roughly ¥8,000-15,000 Per Day

For a backpacker in Japan, here’s a realistic daily breakdown:

  • Hostel dorm: ¥3,000-4,500 (~$30-45 AUD)
  • Food: ¥2,500-4,000 (~$25-40 AUD) — konbini meals, ramen, curry houses
  • Transport: ¥500-1,500 (~$5-15 AUD) — depends on how much you move around
  • Activities: ¥500-2,000 (~$5-20 AUD) — temple entries, museums

As a vegan, I actually find Japan a bit more expensive food-wise than some other Asian countries, because the cheapest options (¥500 gyudon bowls, convenience store onigiri) are often not vegan-friendly. But there are brilliant vegan ramen spots in Tokyo and Kyoto, and konbini inari sushi and edamame are reliable cheap options.

3. Tax-Free Shopping

Spend over ¥5,000 (excluding tax) at a single tax-free store and you can get the 10% consumption tax refunded. You’ll need your passport. This works at major retailers, electronics stores, and many drug stores. The savings add up — 10% off a ¥30,000 purchase is ¥3,000 back in your pocket.

4. Don’t Tip

Tipping is not expected in Japan and can actually cause confusion. This is one budget-friendly cultural norm I appreciate. The price on the menu is what you pay.

5. Konbini Are Your Best Friend

Convenience stores in Japan are nothing like the ones back home. 7-Eleven, Lawson, and FamilyMart serve genuinely good food at reasonable prices. A filling onigiri is ¥120-180, a bento box is ¥400-600, and they have solid vegan options if you know what to look for (inari sushi, natto rolls, edamame, certain onigiri). They also have ATMs, accept IC cards, and sell basically everything you might need.

6. Get Travel Insurance Sorted Before You Go

Japan has excellent healthcare, but it’s expensive for foreigners without insurance. A simple doctor’s visit can cost ¥5,000-10,000, and hospital stays can run into hundreds of thousands of yen. I use SafetyWing for my travel insurance — it’s designed for long-term travellers and digital nomads, starts at around $45 USD per month, and you can sign up even after you’ve left home. It’s covered me across 40+ countries and the claims process has been straightforward the two times I’ve needed it.

Accessing Your Banking Apps in Japan

This isn’t something most people think about, but it’s worth mentioning: when you’re travelling, you’ll be connecting to public wifi constantly — at hostels, cafes, airports, train stations. Japan has excellent free wifi, but that also means it’s a target for anyone trying to intercept data on open networks.

I always use NordVPN when I’m accessing banking apps or making transfers on public wifi. It encrypts your connection so nobody on the same network can see what you’re doing. It’s also useful if you want to access Australian streaming services or if certain websites are geo-restricted.

Beyond security, a VPN can sometimes help if your banking app is being finicky about detecting that you’re overseas. I’ve had situations where Up Bank’s app flagged unusual activity because I was logging in from a Japanese IP — connecting through an Australian VPN server resolved it immediately.

Hostel wifi tip: Japanese hostels generally have decent wifi, but shared networks are shared networks. If you’re logging into Wise, Up, or any financial app, switch your VPN on first. It takes two seconds and could save you a major headache.

Staying Connected: eSIM for Japan

While we’re on the topic of digital setup, you’ll want mobile data sorted before you land. Having data means you can use Google Maps for navigation (essential in Japan’s complex train systems), translate menus, and access your banking apps anywhere.

I use Saily for eSIM data when I’m in Japan. You can buy and activate a Japan data plan before you even leave home, and it kicks in the moment you land. No hunting for SIM card shops at the airport, no fiddling with physical SIMs. Plans for Japan start from around $4-5 USD for 1GB, and you can get larger plans if you need more data. I usually go for a 5-10GB plan for a two-week trip, which covers maps, messaging, and banking app access comfortably.

What About Revolut?

I get asked about Revolut a lot, so here’s my quick take. Revolut is a decent travel card, but it has some quirks that make it less ideal than Wise for Japan specifically:

  • Weekend exchange rate markup: Revolut charges a 0.5-1% markup on currency conversions made on weekends and public holidays. Given that you’ll be spending money on weekends in Japan (obviously), this is annoying. Wise doesn’t do this.
  • Free tier limits: The free Revolut plan limits you to about $1,000 AUD equivalent of fee-free exchange per month. Go over that and you’re paying 0.5%. On a Japan trip, that limit can be hit quickly.
  • ATM limits: Only one free ATM withdrawal per month on the Standard plan, and the free amount is limited to $350 AUD equivalent.

Revolut isn’t bad — it’s just not the best option when Wise exists. If you already have Revolut and don’t want to set up another card, it’ll work fine. But if you’re starting fresh, go with Wise.

What About the Big Four Australian Banks?

If you’re thinking of just using your CBA, ANZ, Westpac, or NAB card in Japan — please reconsider. Here’s what you’re looking at:

  • Foreign transaction fee: Typically 3% on every purchase
  • ATM withdrawal fee: $5+ per withdrawal, plus the 3% conversion fee
  • Exchange rate: Their own rate, which is worse than the mid-market rate

On a two-week Japan trip where you spend ¥200,000 (roughly $2,000 AUD), you’d lose approximately $60-80 AUD in fees and poor exchange rates compared to using Wise. That’s several good meals in Japan. There’s genuinely no reason to use a big four bank card overseas in 2026 when better options exist.

My Recommended Setup: Step by Step

Here’s exactly what I’d do if I were heading to Japan tomorrow:

Before Your Trip

  1. Sign up for Wise and order the physical card (allow 1-2 weeks for delivery)
  2. Sign up for Up Bank as your backup — instant digital card, physical card arrives in days
  3. Convert some AUD to JPY in Wise when you see a rate you’re happy with
  4. Set up Saily eSIM on your phone with a Japan data plan
  5. Download NordVPN for secure banking on public wifi
  6. Get SafetyWing travel insurance sorted
  7. Set up Suica in your phone’s wallet app

When You Arrive

  1. Activate your eSIM data
  2. Withdraw ¥30,000 from a 7-Eleven ATM using Up Bank (free withdrawal)
  3. Load ¥5,000-10,000 onto your Suica from Wise
  4. Use Wise card for in-store purchases where card is accepted
  5. Use Suica for trains, buses, konbini, and vending machines
  6. Use cash for small restaurants, street food, and cash-only spots
  7. Top up cash at 7-Eleven ATMs as needed using Up Bank

This system has worked flawlessly for me across Tokyo, Osaka, Kyoto, Hiroshima, Takayama, Hakone, and everywhere in between. It covers every payment scenario you’ll encounter in Japan.

Frequently Asked Questions

Can I use my Australian debit card in Japan?

Yes, most Australian Visa and Mastercard debit cards will work at Japanese ATMs (specifically 7-Eleven and Japan Post ATMs) and at card terminals in shops and restaurants. However, if you’re using a big four bank card (CBA, ANZ, Westpac, NAB), you’ll be paying 3% foreign transaction fees on every purchase plus $5+ per ATM withdrawal. Use a no-fee card like Wise or Up Bank instead.

How much cash should I carry in Japan?

I recommend having ¥20,000-30,000 (roughly $200-300 AUD) in cash on you at all times, especially outside of major cities. In Tokyo and Osaka, you can get by with less since card acceptance is good, but you’ll always hit cash-only situations. Withdraw larger amounts less frequently to minimise ATM fees.

Is Wise or Up Bank better for Japan?

They serve different purposes and work best together. Wise is better as your primary spending card because you can pre-convert to JPY and lock in a good rate. Up Bank is better for ATM withdrawals because it offers unlimited free international ATM access. Use Wise for card payments and Up for cash withdrawals.

Do I need a Suica card for Japan?

Technically no — you can buy individual train tickets for every journey. But practically, yes, you absolutely want one. Suica (or any IC card) saves you enormous amounts of time, works on virtually all public transport across Japan, and can be used for convenience store purchases and vending machines. Set one up on your phone before you arrive.

Which ATMs work with international cards in Japan?

7-Eleven ATMs (Seven Bank) are the most reliable and widely available option for international cards. Japan Post ATMs are also excellent, especially in rural areas. Lawson and AEON ATMs are improving. Avoid regular Japanese bank ATMs (Mizuho, MUFG, SMBC) as they often don’t accept international cards.

Should I exchange cash before going to Japan?

Generally no. Airport currency exchange desks (both in Australia and Japan) offer terrible rates. You’re much better off withdrawing JPY from a 7-Eleven ATM in Japan using a no-fee card like Up Bank. The only exception is if you want a small amount of cash (¥10,000-20,000) for immediate expenses when you land — but even then, there are 7-Elevens in the airport arrival halls at both Narita and Haneda.

Is Japan expensive for backpackers?

Japan is more expensive than Southeast Asia but cheaper than Australia and most of Western Europe. A comfortable backpacker budget is ¥8,000-15,000 per day ($80-150 AUD), covering a hostel dorm, meals, transport, and some activities. You can go cheaper if you cook in hostel kitchens and walk more, or spend more if you want to eat out at nicer restaurants and take the shinkansen frequently. Having the right travel cards saves you money on every transaction, which adds up significantly over a multi-week trip.


Posted

in

by

Tags:

Comments

Leave a Reply

Your email address will not be published. Required fields are marked *